Downsizing a JPEG image efficiently to a certain size in KB on Android
Downsizing an image is a common task and it seems to be quite simple: you have an image and you want it to take up less storage space, preferably n KB (either exactly n or at most n). A lot of developers have to do something like this for various reasons, either to limit the network payload or just to save the disk space so that the app's data doesn't consume it too much.

A very simple solution to that problem, especially if we are in a hurry, is using an arbitrary image size in pixels that we think should be small enough to meet our disk size criteria. But in the case of a JPEG format the compressed size of an image just cannot be guessed that easily unless we make some assumptions regarding the compression efficiency. For example, a very easy yet ineffective file size estimation might look like this:
- Let's say we want to downsize our JPEG image file to 100 KB.
- Let's assume the worst case scenario is that the JPEG compression doesn't save any space.
- Let's assume we store each pixel in the same way Android loads
BitmapwithBitmapFactoryby default, i.e. usingARGB_8888coding so that each pixel takes up 4 bytes. - In order to take up at most 100 KB the image has to consist of
100 * 1024 / 4 = 25 600pixels. For example it might be 200 x 128 px.
The image of such a small size might be used for an avatar at best.
So, in the next step we search for a quick advice on the web and find out the JPEG compression can actually make an image about 10-12 times smaller without losing much of the quality. That would allow us to use a much better resolution like 600 x 512 px. So, let's run a simple experiment:
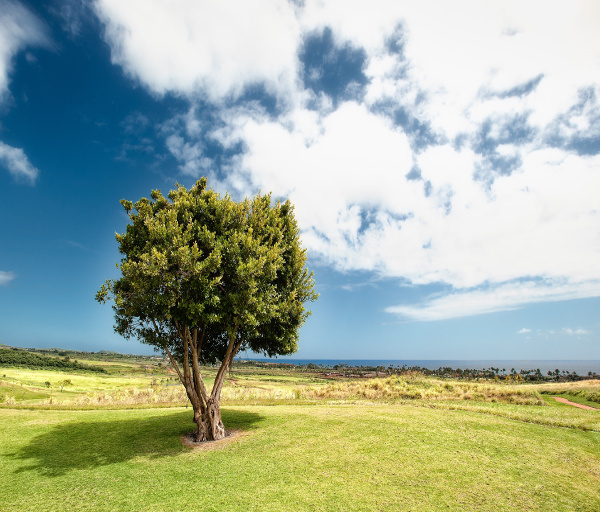
- Visit this site and download the full size image (it should be 3827 x 2546 px).
- Using some image editor like GIMP, change its size to 600 x 512 px.
- Export it to a JPEG file with the quality factor equal to 95 (more on this factor later).

When I did this, the image was downsized from about 2.6 MB to 167 KB so it takes 67% more than what we wanted.
OK, let's try with a different quality factor. But how do we pick a good one? Using 90 I have got a 114 KB file and using 80 it was 76 KB. So, we immediately think that using the quality factor equal to 80 or so and a fixed dimensions like 600 x 512 px is a way to go. Although it might work in many scenarios, this assumption is wrong. Let's prove it by conducting yet another experiment:
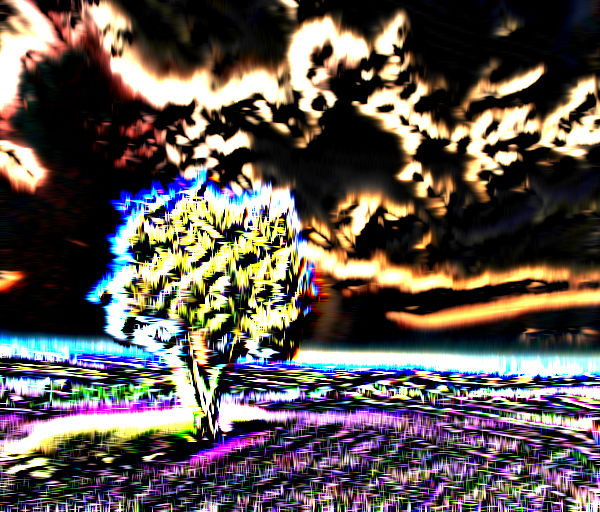
- Using GIMP, let's load the same image file as previously and downscale it to 600 x 512 px again.
- Apply a "Neon" filter (
Filters -> Edge-Detect -> Neon...) with Radius set to 15.00 and Amount set to 0.10. - Export it to a JPEG file with the quality set to 80.

And now I have got a file that takes up 136 KB. The conclusion is simple: using the specific image dimensions and quality factor there is no guarantee the resulting file will be of a certain size.
If you take a closer look on what JPEG compression does under the hood, you might get impressed by how complex that process is. For example:
- it transforms the image to YCbCr color space,
- it performs the chroma subsampling,
- it applies the DCT over the YCbCr components,
- it runs quantization and a Zig-Zag ordering which result in multiple series of "zero" bytes that can be easily compressed using RLE and Huffman coding.
As you can see, quite a lot of the source data is lost during this process (and that's not very surprising as JPEG is a lossy format).
The quantization step uses a configurable quality factor to determine the quantization matrix first. That factor is usually a number from 1 to 100 (e.g. in Android SDK) but it can be something else, e.g. in Adobe Photoshop and Lightroom there is a 0-12 scale. Such a notation difference is not a big deal as the quality factor itself is not directly used to do the compression but to pick the right quantization matrix instead. That matrix may be derived from an exemplary quantization table provided by the International Telecommunication Union (see: "Digital Compression and Coding of Continuous-tone Still Images, Requirements and Guidelines", p. 143) but it is not necessary and each JPEG implementation might use a different way of mapping the quality factor to the quantization matrices.
Let me quickly note just another fact you might have not known about: if you compress an image using a low quality factor (like: 20), then load that compressed image into memory (for example: using the BitmapFactory on Android) and compress it again using a higher quality factor (like: 90), the last image file will take significantly more disk space than the previous one. That's because the higher quality factor results in picking a quantization matrix that produces less "zeros" that could be compressed by the RLE and Huffman coding.
Now, let's get back to our main problem and consider another easy yet ineffective solution. It could go more or less like this:
- Load the source image into the memory.
- Compress the image multiple times using a different quality factor each time in order to find the best one.
- In the meantime, downscale the image dimensions if necessary.
Such a solution has the potential to give the best possible results. Being able to just try everything in a loop (or two) might solve our problem almost perfectly. But what about the performance and resource consumption, especially taking into account the Android platform?
Firstly, loading the full resolution source image into the memory is quite risky. If the image is large enough, this operation might produce OutOfMemoryError right away. Secondly, compressing that image multiple times uses both time, CPU (and thus battery) and it makes our storage last shorter (see: Flash Drive Lifespan is a Problem).
So, let's summarize what we know:
- It's hard to tell what exactly the JPEG compression is going to do with our image in terms of its disk size.
- Both of the simple approaches described above are pretty bad. The first one requires making a blind assumptions about the compression, while the second one requires a lot of resources and creates a risk of the OOM errors.
What about you? Do you use some kind of a proven solution that would give predictable results while maintaining such an efficiency that is acceptable on a mobile device? Please let me know in the comments. In the coming post(s), I will show you how I have overcome this problem after a series of experiments (spoiler: my solution is not perfect though). Stay tuned!

