Exploring ESC/POS: Integrating Point of Sale Printers
During POS software development for our client, we encountered several unexpected challenges with POS printers that weren't fully addressed by the manufacturer's documentation. From understanding the basics of ESC/POS commands to implementing advanced features like adding a 'buzzer' function on printers that seemingly don't support it, this tutorial shows how to overcome various hurdles while integrating thermal printers with a POS system.

What is ESC/POS and what does it involve?
ESC/POS (Epson Standard Code for Point of Sale) is a popularly used communication protocol designed by Epson. The main purpose is to improve the printing process of receipts. The protocol is based on sequences of commands that control the printer without the need for drivers or other configurations. This makes ESC/POS an efficient and flexible solution
Why use ESC/POS at all?
When developing a POS app, the decision to use esc/pos was immediate, we didn't even give it a second thought. Some pros of using esc/pos:
- Compatibility
The ESC/POS protocol is supported by the majority of commercially available fiscal printers. Therefore, regardless of the manufacturer, most printers will be compatible with our system. - Ease of integration
In legacy software, typically printers are connected to Windows via a cable and additional driver installation and management is required. In our new cloud-based approach, the mobile app can connect wirelessly directly to the printer by sending esc pos commands. This greatly simplifies the process of setting up and using printers. - Technology-independent
ESC/POS is based on sending data to a specific port and IP regardless of the technology. This ensures that whether you are using Kotlin, Swift, Flutter or another technology each supports sending network data so it supports sending ESC/POS commands.
ESC/POS documentation
What can we expect?
ESC/POS defines a standard for printing but documentation may vary depending on who manufactures the printing hardware. Even when you decide which manufacturer you will use there still may be some differences between the models.
Documentations - Epson
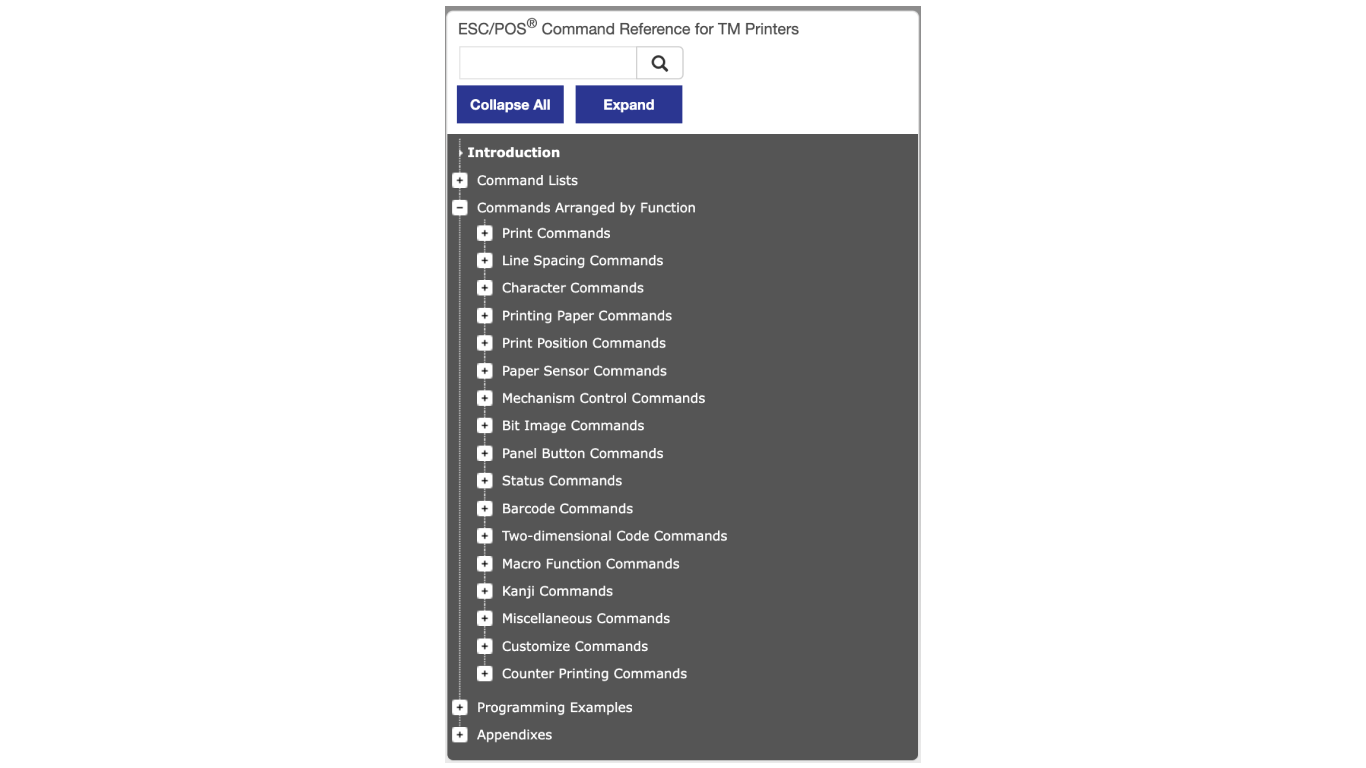
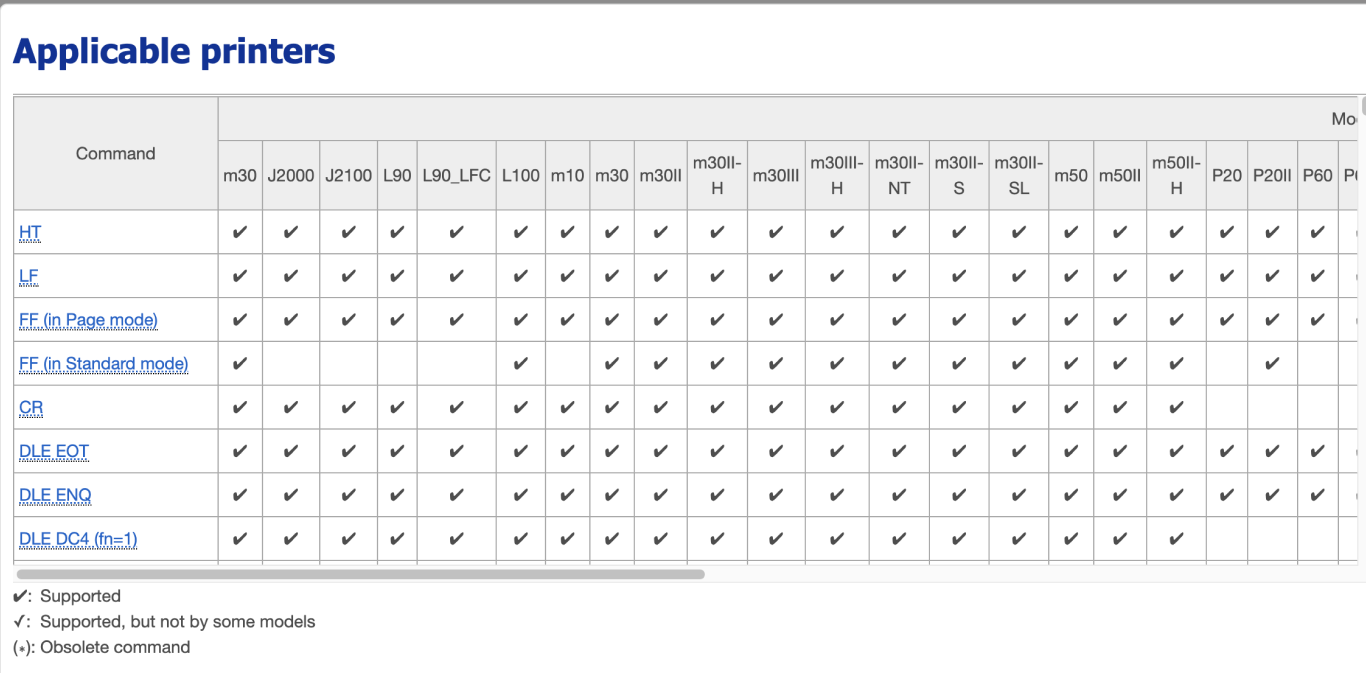
As you may assume the best documentation is provided by the protocol creators - Epson. All commands are neatly provided in specific categories. You even have step-by-step receipt printout examples which should cover most of the basic use cases. And last but not least - you have a list of printers that support a specific method. So if you have to deal with Epson devices - lucky you : )
Documentations - others
Other manufacturers provide (or do not) documentation that isn’t as good as Epson’s. The printers that were used on our project didn’t have any documentation regarding ESC/POS commands. They were mainly used as printers connected via USB so the manufacturer driver took care of all the communication and configuration. In our case, we were communicating with sockets via the local network and we were using mobile devices as a source of printing so we were solely depending on the ESC/POS standard. One documentation worth mentioning is this one. It’s nicely formatted and includes all the basic commands that are used in most cases.
ESC/POS commands
Test printout
This is a test printout that we have implemented in our app in order to check if defined fonts, margins, aligning work properly on a specific printer - it’s a must because of different device specifications and differences in ESC/POS interpretations that I’ve mentioned before.
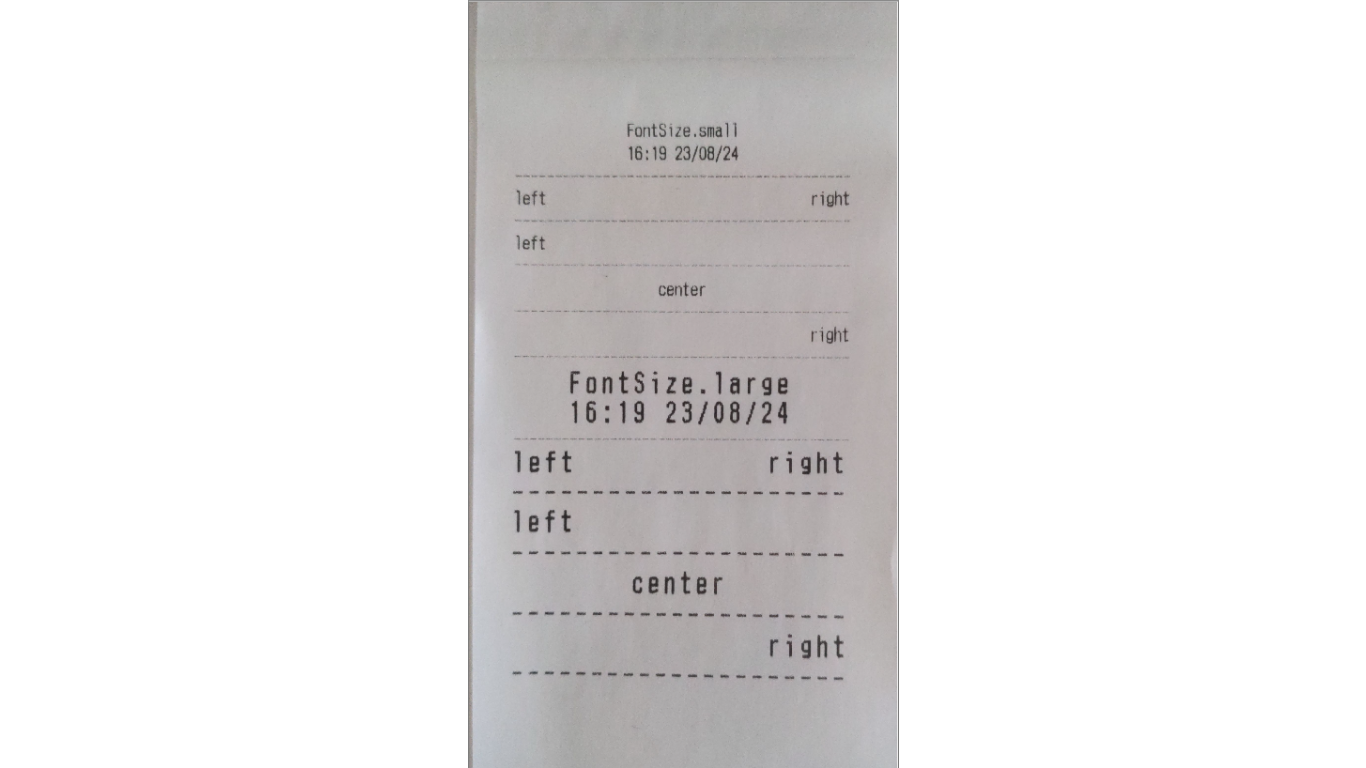
Ok, so how does the printout look like in ESC/POS commands?
Let’s go through a couple of the first lines of bytes that are being sent to the printer:
-
[27, 64] - command initializing the printer ESC @
-
[27, 83] - setting standard print mode ESC S
-
[27, 82, 7] - setting character set ESC R
-
[27, 116, 49] - setting code table ESC t
-
[27, 36, 0, 0] - set absolute print positions ESC $
-
[29, 76, 0, 0] - set left margin GS L
-
[29, 87, 248, 1] - set printing area width GS W
-
[27, 36, 0, 0, 27, 97, 49, 28, 46, 27, 116, 49, 70, 111, 110, 116, 83, 105, 122, 101, 46, 115, 109, 97, 108, 108, 10] - finally a printing line that’s visible as a first line of the test print!
- 27, 36, 0, 0 - again setting absolute position to 0 (we duplicate some of the commands just to be sure that each text line is configured correctly
- 27, 97, 49 - center justification ESC a
- 27, 116, 49 - again setting code table
- 70, 111, 110, 116, 83, 105, 122, 101, 46, 115, 109, 97, 108, 108, 10 - which converted to ASCII is “FontSize.small”
Fonts
Every ESC/POS printer has a predefined set of fonts. This may be different based on the printer specification.
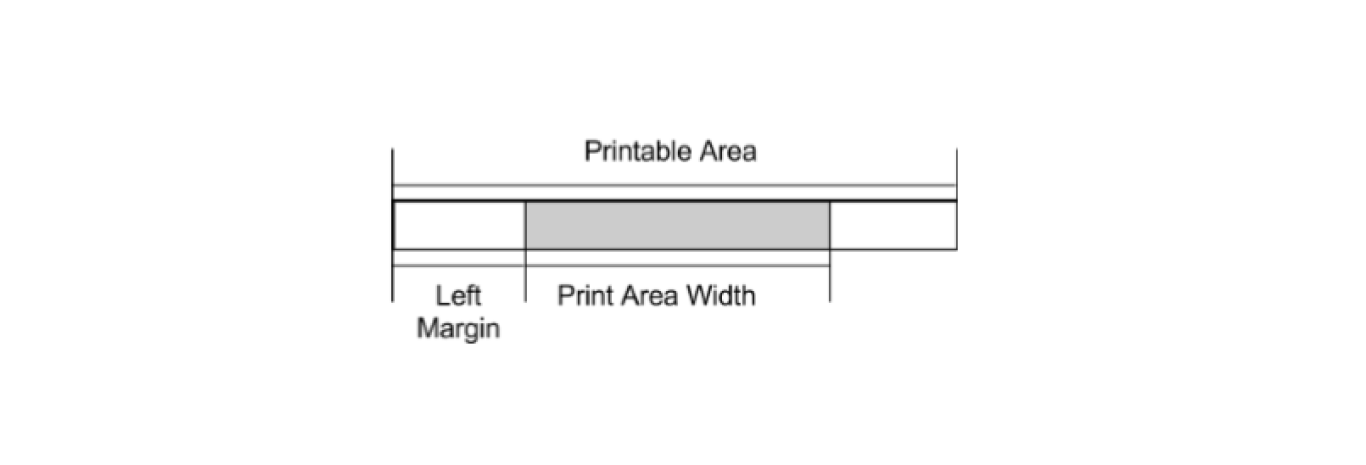
In order to perfectly align your printouts you need to check your printer possibilities when it comes to print area width, DPI (dots per inch) and font configuration. In our project, we calculate how many characters we can fit in a row based on the chosen font, line spacing (which also can be configured) and margin (some printers have predefined physical margins that can’t be changed!).
Source: Pyramid docs
What if we need functionality that is not in the documentation?
During one recent implementation, we encountered such a problem. Our client, a restaurant POS provider, asked for the 'buzzer' functionality that was available in the old software. This is a sound signal usually at the end of a printout to inform the kitchen about a new order. The problem was that there was no mention of this functionality in the documentation for our printer model, even though other models had it. An internet search was also unsuccessful. However, we knew that the old system, running on Windows, was able to do this, which prompted us to investigate.
We decided to analyze what exactly Windows sends to the printer when the sound signal is activated. We configured the printer and connected it to the Windows PC using an Ethernet cable. We installed the drivers and configured the printer to sound at the beginning and end of each printout.
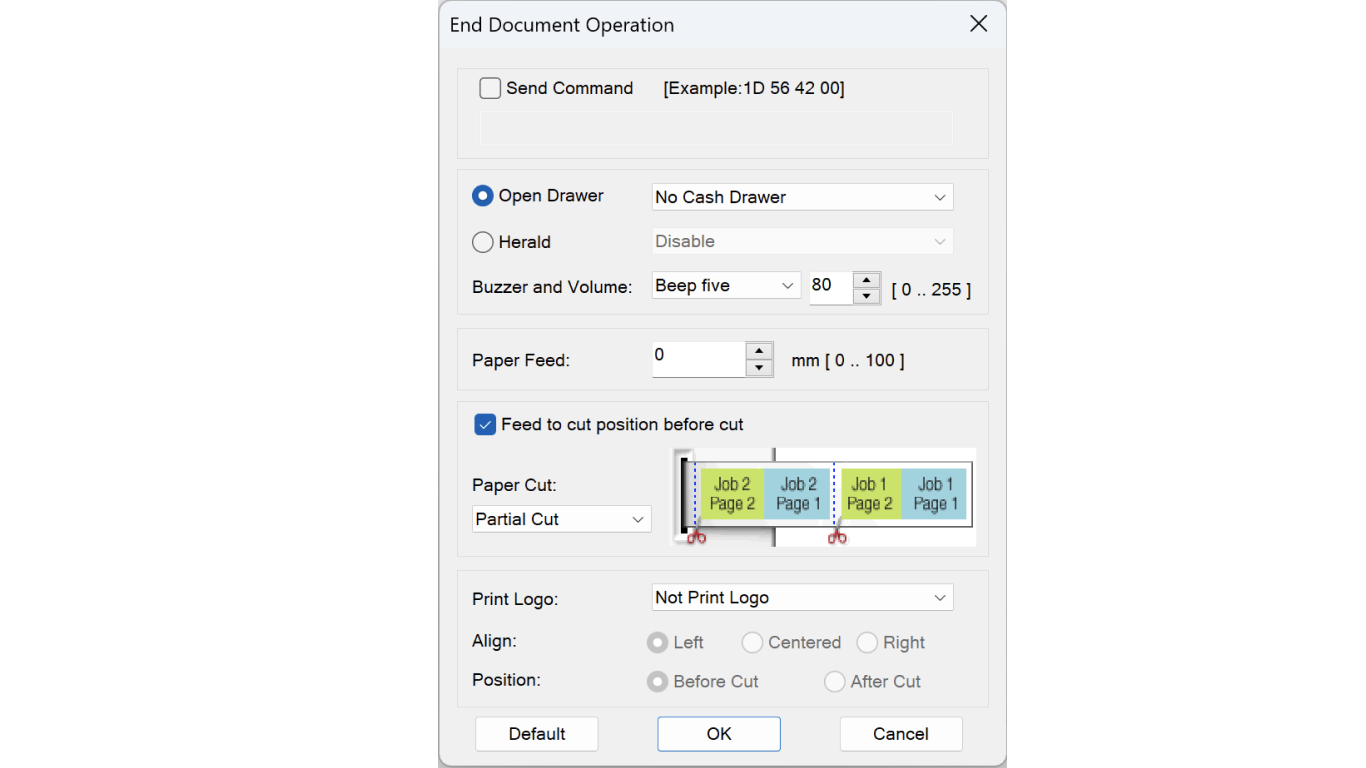
We used Wireshark to monitor our network traffic, setting filters to only see traffic going from our computer to the printer. To simplify things we printed blank documents.
After several tests with different volume and sound length settings, we noticed that each printout generated five network events. Of these, only one contained the data (payload) we were interested in.
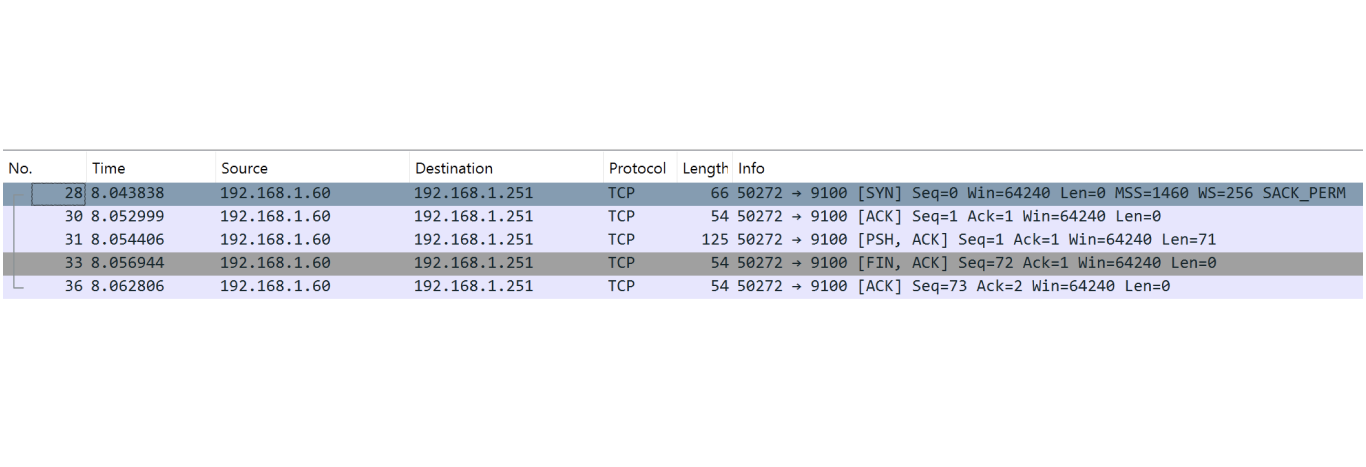
This is what the data looked like in the right network package:
00000000000000000000000000000000000000001b633b011b401d45871d50b4b41d994245929a5601281b08051b08001d994245929a5601501b08051b08001d5642001b633b00
We converted this data into an array of numeric values (ints):
[0, 0, 0, 0, 0, 0, 0, 0, 0, 0, 0, 0, 0, 0, 0, 0, 0, 0, 0, 0, 0, 0, 0, 0, 0, 27, 99, 59, 1, 27, 64, 29, 69, 135, 29, 80, 180, 180, 29, 153, 66, 69, 146, 154, 86, 1, 10, 27, 8, 5, 27, 8, 0, 29, 153, 66, 69, 146, 154, 86, 1, 10, 27, 8, 10, 27, 8, 0, 29, 86, 66, 0, 27, 99, 59, 0]
Then we removed unnecessary zeros and split the data into individual ESC/POS commands:
27, 99, 59, 127, 64, 29, 69, 13529, 80, 180, 18029, 153, 66, 69, 146, 154, 86, 1, 1027, 8, 527, 8, 029, 153, 66, 69, 146, 154, 86, 1, 1027, 8, 1027, 8, 029, 86, 66, 027, 99, 59, 0
After analyzing this data, we discovered that a command is responsible for setting the volume:
29, 153, 66, 69, 146, 154, 86, 1, <volume>
The command responsible for extracting the sound consists of two commands, one sets the value and the other resets it to zero:
27, 8, <value>
As you can see, even without direct documentation, it is possible to arrive at a solution to a problem using network analysis and a bit of reverse engineering. As a result, we were able to implement the 'buzzer' function to meet the customer's requirements.

